 | 10x Design Awards Winner | 📞


Spring Thaw Floor Protection Guide With Boot Racks
Spring thaw survival guide: stop salt, water, and grit at the door
The March melt is coming. Snowbanks shrink, slush thickens, and every entrance turns into a salt-and-gravel highway. Whether you manage a clinic with constant foot traffic or a busy family mudroom, the goal is the same: keep floors clean, safe, and dry without adding hours of mopping to your week.
This guide helps you prep for the thaw with smart maintenance, layout tweaks, and capacity upgrades. You will learn how to deep clean reservoirs, adjust shelf heights for spring footwear, and set up clothing racks with drainage for dripping raincoats and umbrellas. You will also see where not to place racks so you avoid warping, blocked vents, and surprise puddles.
If you are planning one upgrade before the big melt, make it a boot rack with a sealed reservoir. It is the single most effective way to trap water and salt at the door.
Why March is hard on floors
Spring slush carries road salt, grit, and fine sand that settle into grout lines and floor seams. Standing water seeps under baseboards and undercuts finishes. For clinics and commercial spaces, there is also a safety factor: wet entries increase slip risk.
Flat mats and open trays collect water but hold it in place. That slows drying and spreads
odours. A drainage-led rack that channels runoff into a sealed bottom reservoir breaks that
cycle, keeping liquids contained and off the floor while letting footwear dry faster.
Boot trays vs water-channeled racks
Both options catch drips, but they work very differently.
- Flat boot trays: Simple and inexpensive, they catch the first flush of meltwater. They also hold standing water. Salt rings form, odours stick, and you still need to lift the tray to mop underneath. Airflow is limited, so boots stay damp longer.
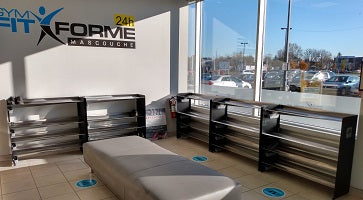
- Water-channeled racks with reservoirs: Sloped tiers and integrated channels guide water, grit, and salt into a sealed container you can remove and empty. Elevated shelves improve airflow for faster drying. Adjustable heights fit short shoes in spring and tall boots during storms. In practice, you clean less, floors stay drier, and your entry looks organized.
If you need to store many pairs in a small footprint, a modular boot rack that stacks vertically wins on capacity, hygiene, and ease of maintenance.
For examples of purpose-built, drainage-led designs that scale from condos to clinics, explore our entryway organizer collection and dedicated shoe rack lineup. You can compare models and capacities, then decide what fits your space and traffic patterns.
- See options for an entryway organizer that integrates with footwear storage at
rakabot.com/entryway-storage-organizers - Browse shoe racks that manage water and salt at rakabot.com/shoe-racks
Where not to place racks
Good placement prevents damage and headaches.
- Avoid direct sun for non-metal shelves. Extended UV and heat can warp some plastics and lighten darker finishes. If sun is unavoidable, choose finishes and materials rated for it or use a sheer window film.
- Do not block floor drains, baseboard heaters, or HVAC vents. Trapping airflow slows
drying and may violate building safety rules. Maintain at least a hand’s width of
clearance in front of grilles and drains. - Keep a small buffer from door swings. Wet doors can drip behind a rack if it sits too
close, and hardware may strike shelves. - For commercial lobbies, maintain clear egress. If you add rolling units, lock casters after positioning and confirm corridor widths remain compliant.
Set up for spring footwear and rainy days
Spring brings a mix of sneakers, ankle boots, and the odd tall pair for slush days. Reconfigure shelves so you are not wasting vertical space.
- Lower one or two tiers for low-cut shoes to increase overall capacity.
- Keep a single tall bay for the last month of melt and for guests with boots.
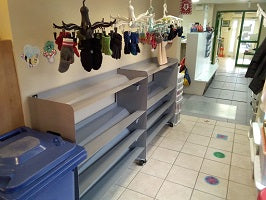
- Add a narrow clothing shelf with a drainage level beneath for raincoats and umbrellas. A drip shelf over a sealed reservoir saves floors from constant puddles and keeps hallways safer.
- In high-traffic clinics, consider shoe racks with wheels so staff can roll units aside for
rapid mopping and end-of-day sanitizing.
If you are building out a sit-and-store zone, a bench with integrated drainage shelving offers seating plus neat storage. See our bench options, including bilingual listings such as banc à chaussures and bench with drawers, at rakabot.com/shoe-storage-bench.
How to deep clean reservoirs and channels
A quick weekly clean keeps systems working and odours down. During heavy melt, do a fast refresh midweek too.
- Empty the reservoir. Slide out the sealed container and pour meltwater into a sink or
floor drain. If there is grit buildup, use a fine strainer so you do not send sand down the pipes. - Rinse with warm water. Add a splash of mild dish soap, swish, and rinse. For salt film, a 1 to 10 white vinegar solution helps break deposits. Avoid harsh abrasives that could scratch finishes.
- Wipe channels and vents. Use a soft brush or microfiber cloth to clear grit from drainage paths. Clear airflow speeds drying and reduces odours.
- Dry and reinsert. Make sure the gasket and contact points are dry so the reservoir seats properly and remains sealed.
- Spot clean shelves. Salt specks wipe off easily on smooth finishes. For stainless or
glass, use a non-ammonia cleaner to avoid streaks.
Weekly upkeep checklist
Use this quick list to sail through the thaw season.
- Empty and rinse the reservoir, then check for salt film.
- Brush out drainage channels and vents.
- Verify caster locks, shelf clips, and extenders are tight.
- Adjust one shelf for low shoes if capacity feels tight.
- Mop the floor under rolling units, then relock casters.
Floor protection tips that actually work
- Place a coarse outdoor mat before the door to shed bulk grit, then a scraper or
absorbent mat inside to catch what remains. Your rack takes the final load. - Choose racks that elevate footwear so heat and airflow can do their job.
- Keep a small squeegee and cloth at the entrance. A 30 second swipe after rush periods saves later scrubbing.
- For clinics, assign a quick midday empty-and-rinse to reduce end-of-day backlog.
Storing a lot of shoes without chaos
To scale capacity without crowding:
- Go vertical with stackable, modular tiers instead of adding more floor mats.
- Mix shelf heights so small shoes do not waste tall-boot space.
- For seasonal overflow, add a compact entryway shelf near secondary doors for garden clogs or kids’ runners.
- If you need fast reconfigurations for cleaning or events, rolling shoe racks simplify
changes and protect floors during moves.
You can find portable options and caster kits compatible with high-capacity racks at
rakabot.com/products/rakabot-titan-5-16-18-caster-wheels-kit
Quick answers to common questions
- Can I make my own boot tray? Yes, you can repurpose a shallow storage bin or a baking sheet with a rubber mat. It will catch drips, but it will also hold standing water and needs frequent dumping. A purpose-built rack with a sealed reservoir and airflow dries footwear faster and reduces floor damage over time.
- Do boot trays prevent damage to floors? They can help, but because water sits in the tray, salt and moisture still migrate and can stain or seep if the tray overflows. A
water-channeled rack that captures runoff in a sealed container offers better protection and less mopping. - Where should I not put a shoe rack? Avoid direct sun if the unit is non-metal, do not
block drains or HVAC vents, and keep clear of door swings and emergency egress
paths. Maintain small gaps from baseboard heaters. - How do I clean a boot tray or reservoir? Empty it, rinse with warm water and mild soap, use a vinegar solution for salt film, wipe channels and vents, then dry and reinsert. Avoid harsh abrasives that scratch.
- What is the best way to store a lot of shoes? Use a modular, vertical system with
adjustable shelves. Combine low bays for sneakers with one tall bay for boots. Consider rolling units for easy cleaning and add drip-friendly clothing shelves for coats and umbrellas.
Ready for the melt
A few smart changes now will keep salt, water, and grit contained when temperatures swing. Prioritize drainage-led storage, adjust shelf heights for spring footwear, and add drip zones for outerwear. If your current setup is flat-mat only, upgrade to a boot rack with a sealed reservoir before the big melt. Need help sizing or planning a custom layout for your home or clinic? Reach out for support and a configuration that fits your footprint and traffic.